
With every image created there is a God-story to be told, a person’s journey, a moment captured in history, a visual stake in the ground.
With every image you create, you are showing Him. Your images can be seen globally, on all platforms, so every image is a visual testimony; of our church, His power, His restoration, His love and goodness. It is key that they represent all we do in the truest form. The heart should always be “how could I reflect God’s creation and journey of this subject in the best way possible?”
Below are some important notes to make sure that we are representing the Church in all its beauty in the best possible way.


Below are some example images of great shots that help our marketing & social media team out!

Action is a great way to capture kids/teens and convey a fun, light hearted welcome

GOLDEN RULES
Keep your eyes open to capture moments, not just meetings!
Photos need to tell a story and capture the emotion of the moment, not just the facts.
Capture our volunteers as they serve before, after and during church e.g. baristas, ushers, carpark team, production etc.
PEOPLE PEOPLE PEOPLE. DIVERSITY DIVERSITY DIVERSITY. A smile is worth a thousand words! Heaven has no race, age or style barrier, our photos shouldn't either! If you find yourself at the end of a service and you haven't captured any honest moments that took place off-stage, you probably didn't accurately reflect the community and koinonia that our church is built on.
Shoot in RAW format, not jpeg! The editing/post-processing power is amplified when photographing in raw format. To learn more about the difference between the camera formats, click here.
Don't shoot during sensitive altar call moments (salvation response call or an altar call for a sensitive issue. If in doubt, don't shoot).
Don't shoot with flash unless there is already dynamic, fast paced stage lighting happening (aka during a real love style praise song). During messages, worship and most items, flash is distracting and to be avoided.
Organise your photos. Yes, ORGANISE your photos! Our basic labelling system is as follows: move raw photos into a folder labelled "YEARMONTHDAY - PREACHER/EVENT" E.g. 20170210 - Sisterhood Morning Tea or 20170103 - Josh Greenwood. Inside that folder, you can get Lightroom to export to an 'Edited' folder where your edited photos (the best of your set) will be. If you're not shooting at Paradise, you're expected to bring your hard drive in to the media office as soon as is practical (throughout the week), so that it can be transferred to the NAS for archive and storage.
Children's faces should only be captured with their parents permission (preferably before the photo is taken). If they're nearby, a simple "Hi, I'm the photographer for today's service, I'd love to take a few pictures with your child and their friends, are you comfortable with this?" should suffice.
Label your batteries, CF cards, bags and accessories as much as you can. During big events there is always a plethora of floating around and we want to avoid mixups with personal belongings!

A little bit of planning and preparation can go a long way in creating a fun, effective image

Whether set up or natural, volunteers and visitors smiles are gold!
USING FLICKR - PHOTO MANAGEMENT
Photos should be edited and the best (highlights) of the set uploaded to Flickr within 30 minutes of the service/event end. In some cases (conferences / all day events) it is appropriate to upload throughout the day / night activities. In a normal service situation, within 30 minutes of the service end is ideal.
Flickr account details:
Username: influencerschurch.media@yahoo.com.au
Password: influencersmedia57
The upload process
Once you have selected the best photos from your set (usually somewhere in between 10 and 30), you can upload them as jpegs to Flickr. Navigate to your "edited" folder where lightroom has exported the files, and open up Flickr to the upload page (flickr.com) illustrated by the cloud in the right top hand corner of the page:

Drag your highlight photos into the window, and wait for them to upload. If there are tags relevant to the whole set (e.g. campus location), you can add them here on the left hand side bar by clicking 'add tags'. More than likely, you'll have to add some tags later which specify in greater detail the photos you've uploaded.
Once they've loaded, click "Upload photos" on the right hand top corner button, and you're good to go!

Tagging photos
In order to make it easier for pastors and social media managers to search through thousands of photos, we've implemented tagging as a way of organisation. After you have uploaded your photos you can tag them with any keywords necessary that will make them easier to find.
Please always tag the first and last name of the pastor / preacher in the relevant photos, as well as your campus location on every photo (e.g. a photo of Ps Josh preaching at Paradise would be tagged 'Josh' 'Greenwood' 'Paradise')
Other relevant tags are 'womens' 'Christmas' 'cafe' 'outside' 'kids' 'worship' 'crowd' 'conference' 'dance' 'mens' 'foyer' 'dream team' 'volunteers' etc.


DRESS CODE
There are a few reasons as to why we have official Photography t-shirts for all involved.
1) It keeps us inconspicuous. This is especially important when taking photos near the front of an auditorium.
2) It identifies us so that the church community knows we have been police checked (especially around kids) and are not going to be distributing footage or making it public domain.
3) It identifies us as a friendly face / point of contact should they be interested in serving in this area or have a general question about church.
If for any reason you have forgotten your tee or can't wear it, we also have lanyards that identify you as a part of the media team at every campus.
If you need to order a new t-shirt let us know ASAP!
Editing in Lightroom
We use Lightroom to edit all of our photos. There will often be an "Edited in Lightroom" Folder within our raw photo service folder where you can find the exported versions of the raw photos that have been taken.
Why Lightroom?
Lightroom is a really easy-to-use yet powerful photo editing software that comes in the Adobe Creative Cloud, already installed on church computers, and often volunteers also have the software.
The presets are easy to import and export, making the same "look" available on anyone's computer who owns Lightroom already.
It is easy to make local adjustments to colours, curves and the like, and batch processing is a cinch.
What presets do we use?
You can download our church most-used presets (and some fun freebies) here. Remember to adjust the exposure and white balance accordingly after applying the preset.
Click here for a comprehensive tutorial for using, installing and saving Lightroom Presets.
NB: If for any reason you need to edit a photo outside of Lightroom (e.g. one taken on an iphone) - the VSCO app is recommended.

Instagram accounts we can learn from
Here's a moodboard we've put together with some great images from accounts all over the world.
Below is a categorised list of accounts we think might have some inspiration for you:
Photographers:
@belpang
@argaet
@rbarntt
@lindspruitt
@bensasso
@photography.hills
@photography.melb
@newspringcrtv
Churches:
@thecausekc
@mosaic
@c3toronto
@hillsongmel
@elevationchurch
@vouschurch
@zoechurchla
Keen to learn more? We'll post helpful tutorials below!


CAPTURING STORIES by Hillsong London photographer Hannah Burton
With every image created there is a God-story to be told, a person’s journey, a moment captured in history, a visual stake in the ground.
With every image you create, you are showing Him. Your images can be seen globally, on all platforms, so every image is a visual testimony; of our church, His power, His restoration, His love and goodness. It is key that they represent all we do in the truest form. The heart should always be “how could I reflect God’s creation and journey of this subject in the best way possible?”
Below are some points that stick out to me when capturing someone’s story.
1. Pray
Before every shoot or during the shoot, I ask God to show me what He wants me to create, what He wants me to see. What is their story? If I’m struggling to find it (which can happen), I will ask Him to show me.
“Open my eyes so I can see what you show me of your miracle-wonders”. Psalm 119:17 (The Message)
“But I do more than thank. I ask—ask the God of our Master, Jesus Christ, the God of glory—to make you intelligent and discerning in knowing him personally, your eyes focused and clear, so that you can see exactly what it is he is calling you to do, grasp the immensity of this glorious way of life he has for his followers, oh, the utter extravagance of his work in us who trust him—endless energy, boundless strength!” Ephesians 1:15-19 (The Message)
2. Knowing Your Subject
You need to build a relationship with your subject. Whether your shooting a speaker on a Sunday or a portrait editorial, it is key that you build a relationship and have an understanding of their best angles, sides, etc… that you have spent time knowing them; their best expressions and true expressions. The worst thing for me as a photographer is when you walk away from a shoot with a misrepresentation of who the subject really is.
Build a level of trust and allow yourself to be vulnerable so they too can be vulnerable. Open them up to give you the expressions that reflect their true personality.
3. Preparing for Your Shoot
Preparation for your shoot is key — researching, studying the lighting set up on stage and off stage, looking at your environment before your shoot to know which lights and angles are best to capture your subject, etc… the last thing you want to happen is that you turn up with no idea of your subject’s positions, angles, that the lights are not what you thought and your settings are all wrong.
Creating a visual brief for your subject and referencing shots is very important! Make sure you are creativity prepared and pushing your ideas and creative concepts on every shoot, thinking about the environment you are shooting in and what you can do with it. Along with that, be preparing your subject by explaining your ideas to them, so you can bring them on the journey and they feel comfortable with the brief and know that it is a true representation of what they want to capture.
SEE ALSO: 5 Tips For Filming Better Footage
4. Telling a True Story
I have always wanted to create an environment where the subject can walk in and come as they are, be who they are and that the images represent that. In every image you create, it is an opportunity to elevate others (instead of yourself) and for God to be seen in their lives. So it needs to be the truest form of your subject — if they are not naturally outgoing, then maybe don’t get them to jump around. Spend time asking them questions about themselves, ask about their journey and find out their interests so you can use it to your advantage.
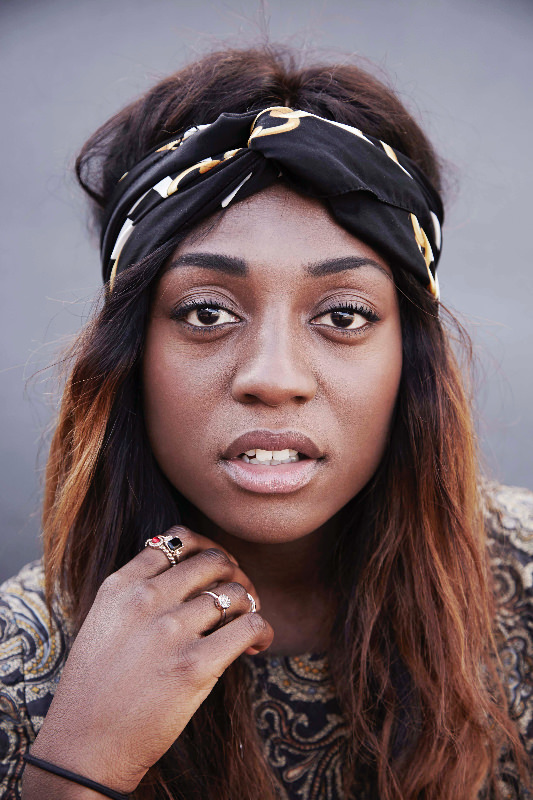
Your subject is on a journey, one that you may be able to relate to or not. But it is a story to be told that will help someone else. God has created that person in a unique, beautiful and bespoke way. Look at them, study them, what unique features do they carry? Dimples? The way they laugh? The way they carry themselves? A scar, a tattoo? Maybe the way they move their hair, or a t-shirt? It all tells a story of who they are. Use it to tell their unique story. Sometimes their face doesn’t need to be in the shot to tell the story. Think outside of THAT box.
Every person is beautiful, inside and out, and for me it’s about creating an environment where you are able to see it and for themselves. I always think what it must be like; speaking or being in a studio or singing, when cameras are around you. Every person has insecurities and I think it’s important to relax them to a point where they forget them.
5. Timing
Timing is everything in photography — waiting for that perfect shot can be painful but so rewarding. Rather than taking a shot for the sake of it, look for the best angle of your subject (usually not too low), the best light, and position yourself and wait … chances are you will save time in your edit later on, because you are creating that image in camera, you have tested your settings and ready to create that ‘wow’ shot.
6. Excellence
In all we create, let it be a God-breathed level of excellence. Let it be the truest, purest representation of the God-given skill and subject He has given you. Create variety in your shots, that show diversity and telling the story of what you are capturing. Our God is the Creator of the universe, He created us in His image and we have the ability to create!
“God looked over everything he had made; it was so good, so very good!” Genesis 1:31 (The Message)